
Make it Using Everyday Objects – You don’t even need to buy the lenses!
To make the Headset you will need:
- Scissors
- Cardboard (A3)
- Paper (A3)
- Stencil Cutter/Knife
- Glue
- Quick Dry Epoxy
- Clear Plastic Bottle made of Polyethylene Terephthalate (PET)
- Syringe with needle
- Velcro or Rubber Band
- Glue Stick and Glue Gun
- Neodymium Magnet (optional for older iPhones)
- Smartphone (iOS/Android)
- Downloaded template
The Steps:
- Make the Lenses
- Make the Template
- Make the Enclosure/ Headset
1. Make the Headset Lenses:
What you need to do to make a pair of Biconvex Lens for the VR Headset is:
- Firstly, make a circular template (25mm in diameter) on a sheet of paper.
- Use the template to cut circular pieces from the plastic bottle using scissors. You need 4 of these. Make sure to use the part of the plastic bottle with good curvature.
- Combine 2 of the circular plastic cut outs to make a biconvex shaped lens and carefully seal the circumference using the quick dry epoxy.
- Do the same with the remaining pair of plastic cut outs.
- Now, fill your syringe with clear water and carefully inject it inside the biconvex lenses. (You can gently squeeze the lens to remove any air bubbles and then continue to fill.)
- Seal the hole made by the syringe and leave to dry.
- Repeat steps 5 & 6 with the second pair of lenses.
Now that you have your lenses we can make the cardboard enclosure for them.
2. Make the Template
For the template:
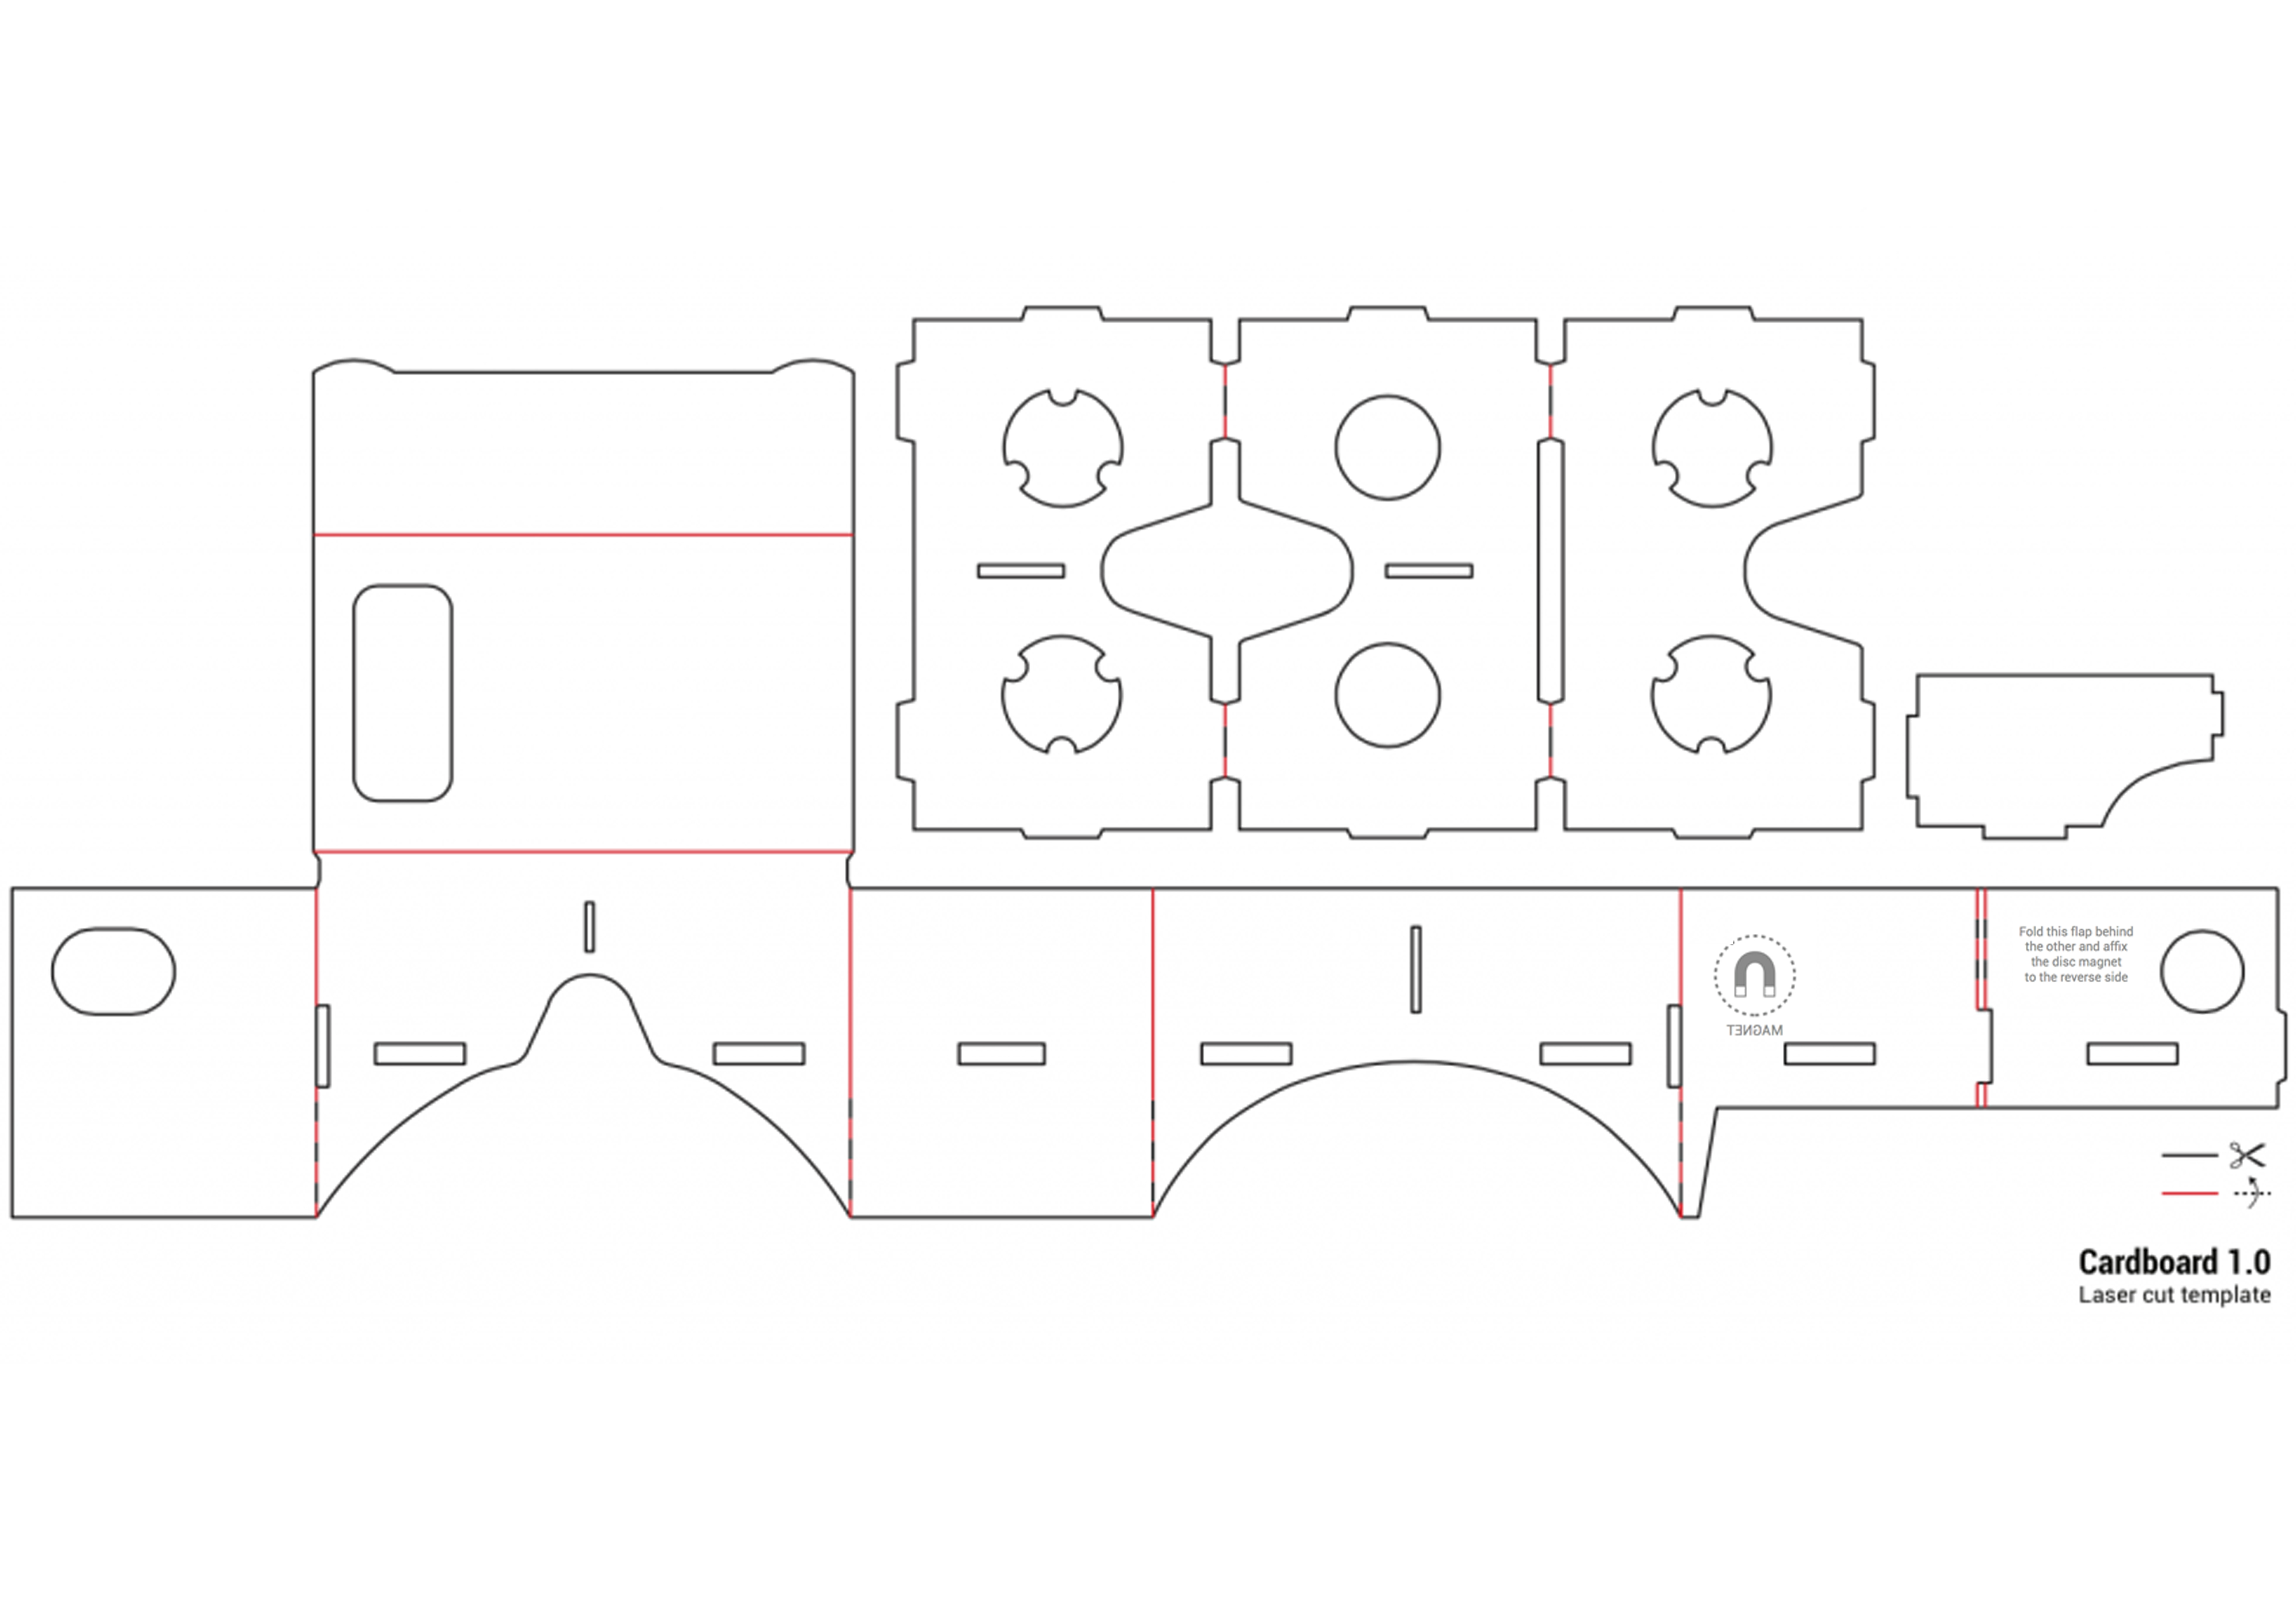
- Save this jpeg and print it landscape on A3 paper. The dimensions should be just right. You would need colour cartridges to print the red lines. (For everyday printing use such as this, why not try our great value and premium quality range of compatible ink and toner cartridges?)
- Glue the template on A3 cardboard and once dry, cut out using scissors and a stencil cutter/knife. Take care to cut only along the black outlines.
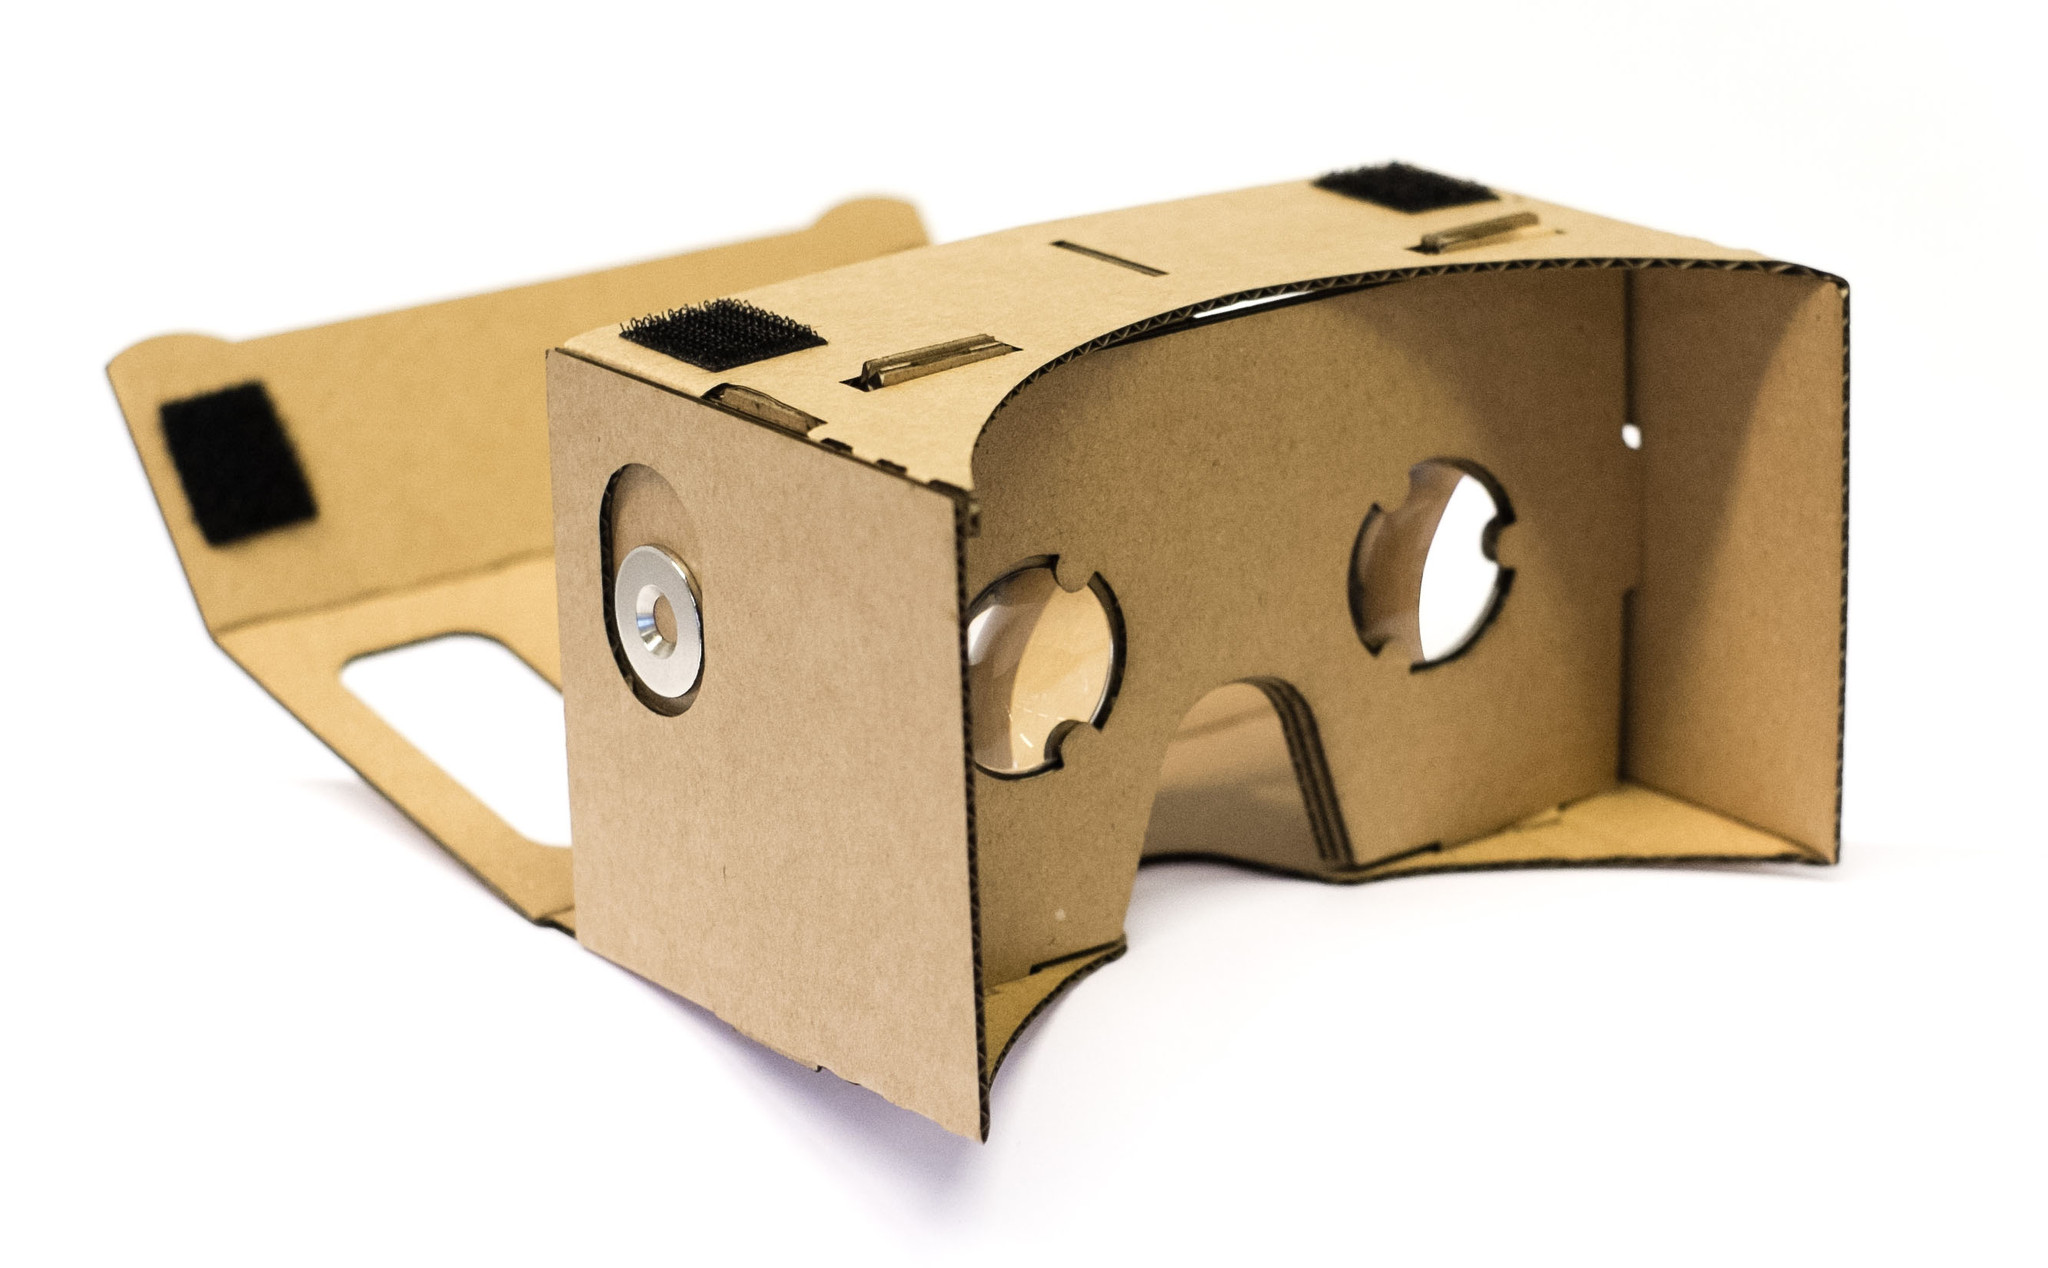
3. Make the Enclosure/ Headset
Now you are ready to assemble you headset. Follow these instructions:
- First of all, fold along the red lines.
- Affix the two biconvex lenses in to the lens part and fold so that there are 3 layers of cardboard to make the lens holder.
- Next, attach the flaps of the cardboard lens holder into the boxes of the other cut out.
- After that, affix the disk magnet using glue on the dotted circle with mirror image of ”Magnet” written on it.
- Then, stick the ring magnet with the other on the reverse side.
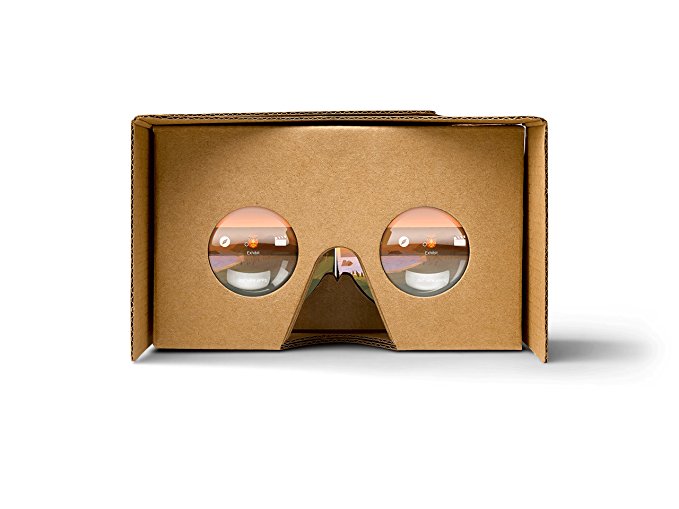
Your VR Head is ready for use!
Download the Cardboard App from the Google Play Store onto your Smartphone to use it. Place your phone inside the VR Headset and secure with Velcro or a rubber band. Enjoy!
If you are feeling confident and more adventurous, why not use AutoCAD to design a 3D model this VR headset? Check out our range of 3D filaments.
Bookmark this Article


